
Craft Project Central: Butterfly Mobile & Card


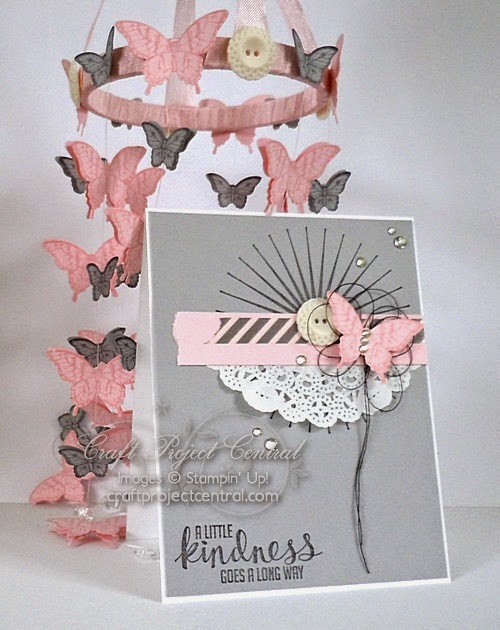
Make this sweet butterfly mobile to decorate your craft room or give it away as a special present to a sweet friend who likes butterflies. It’s easy to change the theme and make this mobile for a baby shower or as a wedding decoration. Great for a stamp camp or as a class project.

This project was created by Monika Davis. You can get the full tutorial for this project when you subscribe to Craft Project Central for September. While you are there, be sure to leave Monika a comment for the lovely project she created.

Comments

Popular posts from this blog

December Challenge: Brr! It's Cold!

Let's start December with a new challenge over at the My Pumpkin Challenge ! The last Paper Pumpkin kit was so adorable. I can't wait to see what everyone is making with it. The Challenge this month is Brr! It's cold. I live in Colorado and it is usually really cold and snowy this time of year. Yesterday the temperature was 60 degrees. My son wore shorts to school. It does not feel like December yet! It is weird to see Christmas lights hanging with no snow. I don't think snow is even in the forecast in Denver. But, in the spirit of winter here is my sample this week! p.s. I am not complaining about the warmth, just noting that it is odd. ;) I used one of the cute snowflake cards to make this hot cocoa treat. I cut one flap off the card (the end with half a snowflake). Then I used sticky tape to tape the sides of the remaining snowflake piece, to make a pocket for the hot cocoa packet. I stamped some snowflakes along the bottom and embellished the centers with rhi

New! Wishes and Stars Challenge

Let's welcome August with a new challenge over at the My Pumpkin Challenge . The theme this month is " Wishes & Stars ." It totally fits the July Paper Pumpkin kit. I love the options they provided in this kit and all the products too. You still have time to sign up for your Paper Pumpkin kit and to take advantage of the great deal going on now. Here is my sample this week. I made a star border with the different size star shapes from the kit. I traced the star outlines first, cut around my pencil lines then adhered the stars. (I thought it would look cleaner that way instead of having to cut around the stars and get in the tight areas.) The front says Make a and the inside actually says WISH, but I left my camera at work so I will show you the inside tomorrow. Don't forget to stop by the My Pumpkin Challenge today to for more inspiration. We would love for you to share your creations too! Don't be shy, even if you do not have a blog you can participa

All of May!

I have been slacking here this month. This has been one busy month for me. I mean, all my months are busy but these last few weeks have been a bit different. We are swapping rooms in my house. My son is moving into my craft room and my daughter is moving into my son's old room. So right now all of my craft items (ALL OF THEM) are in my living room, dining room and even in my kitchen! My son is almost fully moved into his new room. We just finished painting my daughter's room and can now get her situated. Once she is moved in, I can move my craft room to her old room. I am excited because my new craft room will be bigger and it will give me a chance to re-organize everything! But, being in limbo right now is no fun.  I did make some Paper Pumpkin projects for the My Pumpkin Challenge though! I apologize I did not have weekly recaps. I should be back to my regular schedule soon! I hope you will share your creations over at the My Pumpkin Challenge ! Did you make t