Every month I hold a card class in my house. I have an amazing group of ladies who come over and get creative with me. I love it! We have such a fun time. We laugh, make fun projects and eat. I love to eat. I always try to have yummy food and thanks to Pinterest I usually try something new. My good friend Dolores, who is always so kind, usually brings a treat to share. We all look forward to it. This month she brought a delicious trifle. Have you heard of a trifle before? (Not to be confused with the noun, this is a dessert!) It is typically a cold dessert layered with pudding/custard, cake, and whipped cream. The dessert Dolores brought was heavenly. She was kind enough to write it down so I could share it with you! She was inspired by this recipe she saw on pinterest but she changed it up a bit and made it her own.

Biscotti Cheesecake Trifle Recipe:
--Crumb Crust--
1 1/2 Cups Almond Biscotti Cookies (Crumbled)
1 Stick of butter (melted)
1/2 Cup Sugar
1 Cup Coconut
Preheat oven to 300°. In a large bowl mix the biscotti, sugar and coconut, then add the butter and combine together. Place this mixture on a cookie sheet and bake for 15 minutes. Stir every 5 minutes to prevent burning. When it is nice and toasted remove from oven and set aside. (Reserve two tablespoons for garnish)
--Filling--
1 - 8oz package Cream Cheese (softened)
2 - Boxes Cream Cheese Instant Pudding
1 - 14oz can Sweetened Condensed Milk
3 Cups Milk
6 Bananas (sliced)
1 - 8 oz container frozen whipped topping, thawed
In another bowl beat cream cheese until smooth. Add can of sweetened condensed milk and beat until well combined. Add the pudding and milk and beat until smooth. Now it is time to assemble this yummy treat!
Layer the pudding, bananas and crumb crust in your serving bowl until it is about 3/4 full. Top with whipped topping and sprinkle the reserved crumb crust on top. Refrigerate until ready to serve. Enjoy!
I hope you will try it! If you do please let me know what you think!
We did not eat the WHOLE time! Here are the cards and project we made this month.

Thank you for stopping by! I hope you are enjoying Spring, though we are still waiting for it to arrive in Denver!

Biscotti Cheesecake Trifle Recipe:
--Crumb Crust--
1 1/2 Cups Almond Biscotti Cookies (Crumbled)
1 Stick of butter (melted)
1/2 Cup Sugar
1 Cup Coconut
Preheat oven to 300°. In a large bowl mix the biscotti, sugar and coconut, then add the butter and combine together. Place this mixture on a cookie sheet and bake for 15 minutes. Stir every 5 minutes to prevent burning. When it is nice and toasted remove from oven and set aside. (Reserve two tablespoons for garnish)
--Filling--
1 - 8oz package Cream Cheese (softened)
2 - Boxes Cream Cheese Instant Pudding
1 - 14oz can Sweetened Condensed Milk
3 Cups Milk
6 Bananas (sliced)
1 - 8 oz container frozen whipped topping, thawed
In another bowl beat cream cheese until smooth. Add can of sweetened condensed milk and beat until well combined. Add the pudding and milk and beat until smooth. Now it is time to assemble this yummy treat!
Layer the pudding, bananas and crumb crust in your serving bowl until it is about 3/4 full. Top with whipped topping and sprinkle the reserved crumb crust on top. Refrigerate until ready to serve. Enjoy!
I hope you will try it! If you do please let me know what you think!
We did not eat the WHOLE time! Here are the cards and project we made this month.

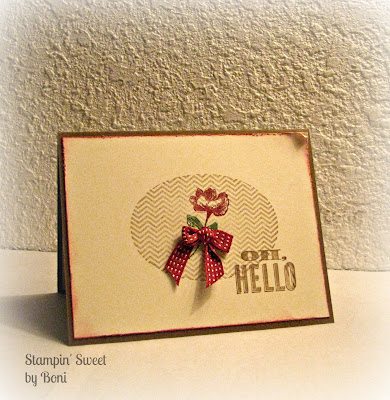
For the card above we used the Oh, Hello clear mount stamp set. I CASE'd this card from my friend Kathy. She also showed us how to make a fork bow, which I in turn showed my class! Check out her video here if you want to learn how to make a fork bow! Perfection every time!

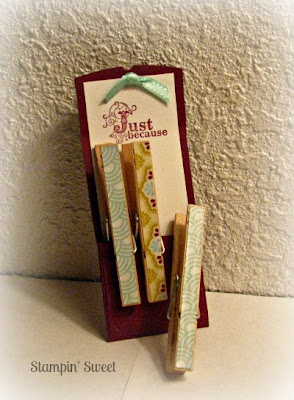
This cute project was inspired by Sincerely Babette. We used the Petite Pocket Bigz Die for the base. We also used some fun Sale-A-Bration (Stamp Set, Designer Series Paper and Ribbon) items to embellish the project. On the clothespins we decorated them with Designer Series Paper, then applied some Crystal Effects over the DSP to add some dimension. To finish it off we adhered magnets to the back. I think this would make a perfect lil gift for someone! It is great to see how versatile all the Stampin' Up products are!

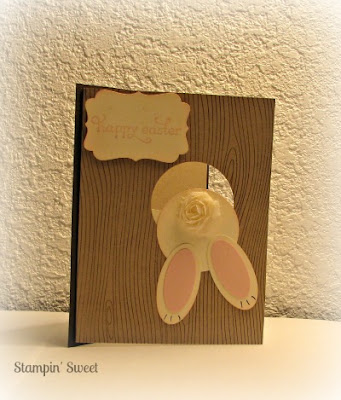
This cute Bunny card has been all over Pinterest. I am not sure who created it but I knew we had to make it. On the front of the card you can see his cute little tail (we used the 5/8 flower trim) and on the inside of the card you see his adorable face hanging out. This card was the highlight of class! We used an assortment of Stampin' Up punches to make the bunny.

Thank you for stopping by! I hope you are enjoying Spring, though we are still waiting for it to arrive in Denver!
Looks like a great recipe and I'm going to take it to our Mother's Day potluck. The recipe calls for Cream Cheese Instant Pudding, but I've never seen that flavor in the store. Would Cheesecake-flavor instant pudding work just as well?
ReplyDeleteOh great catch Suz! I bet that is what she used! I will update the recipe. Thank you! I think you will love it! :)
DeleteI made this for the Mother's Day potluck at church last Sunday and it was a huge hit! Making it again this weekend for family coming into town to visit. My dad and hubby are licking their chops already!! LOL Great recipe!!
Delete